Showing posts with label Reclining Chair. Show all posts

Sunday, April 1, 2012

The Radiant Recliner

It's another recliner! This one was actually brand-new, just off of the show room floor...nothing wrong with it at all, except the fabric was totally wrong for the owner. That's where I come in to play.


This chair is the 
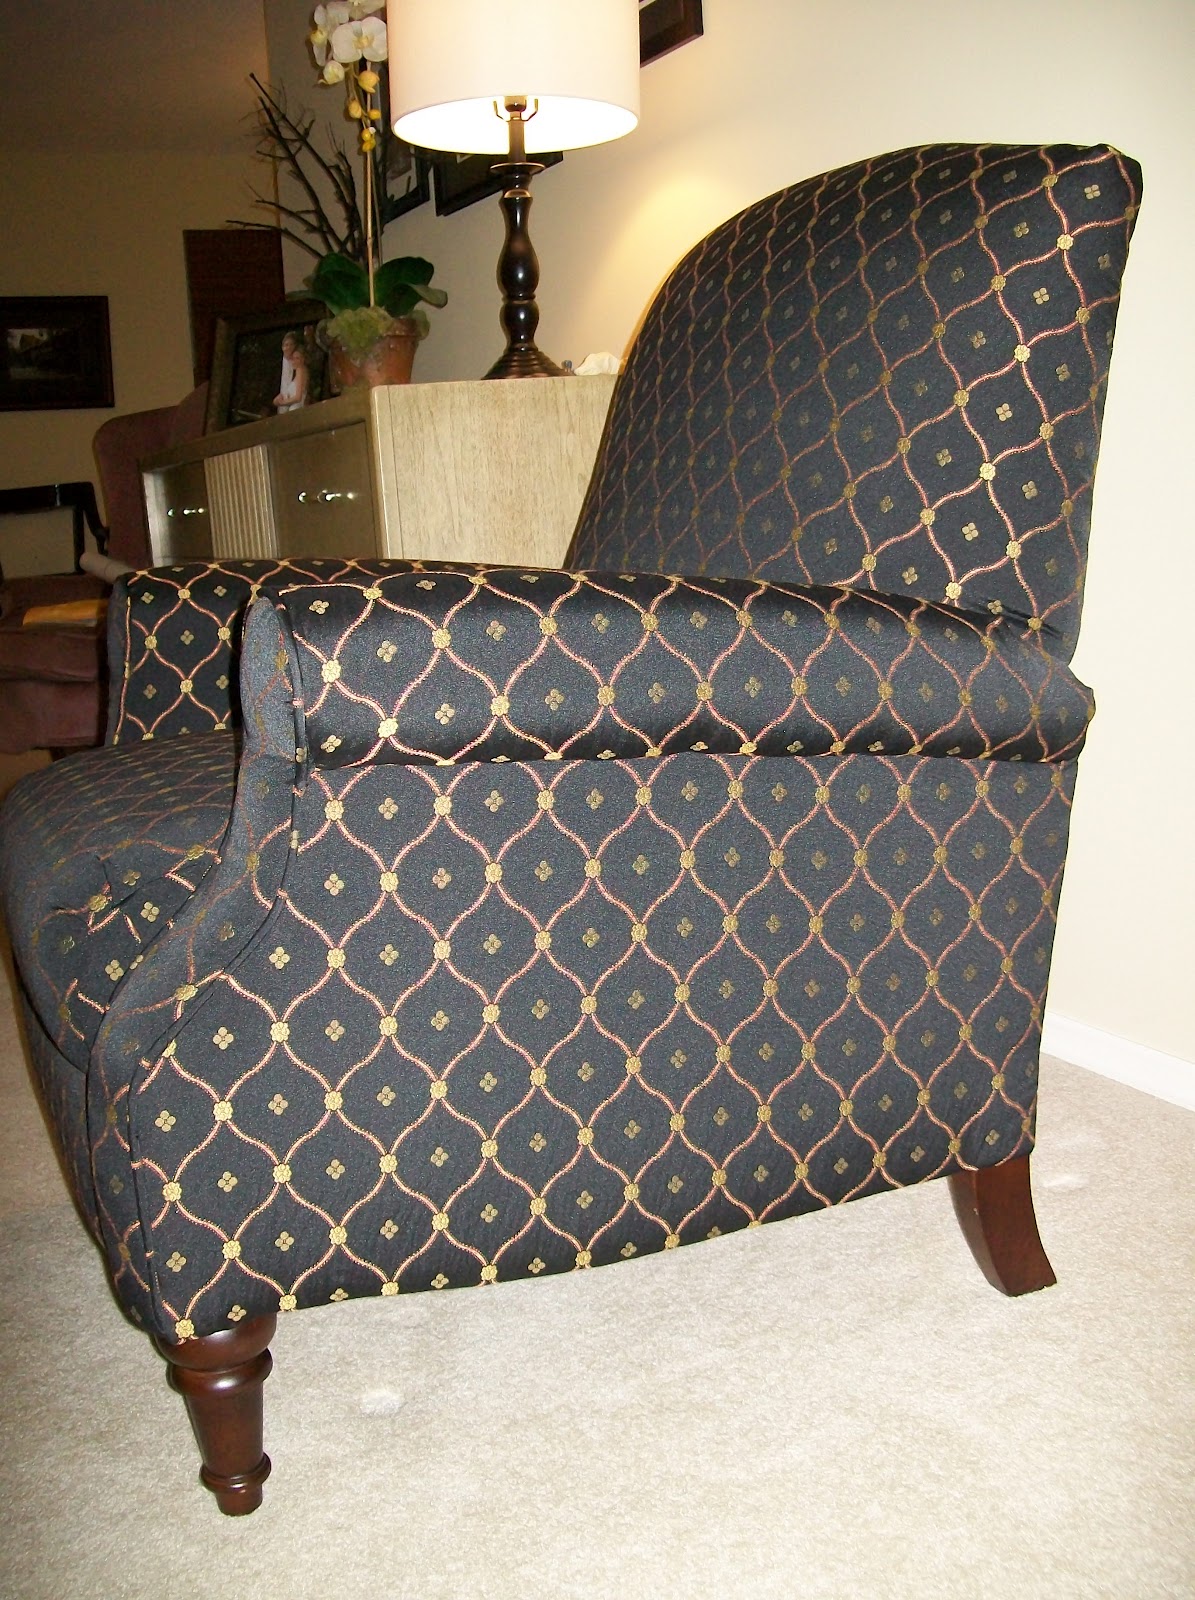
Chloe Hi-Leg Recliner by Lane Furniture. It's a compact, stationary chair that does not look like your typical recliner. G.E's chair required 7 yards of 54" wide fabric to re-upholster. She chose a black, diamond patterned fabric with red and gold accents. The fabric is called Arden, Black.


Head, shoulders, knees and toes...knees and toes!
A word to the wise: to get started with a re-upholstery project, make sure to take lots of pictures, measure and label every piece of original fabric. Once everything is measured and labeled, begin taking out those staples, starting at the bottom. As you remove the fabric, make sure to save it. You will use it as a pattern to trace onto the new material in order to keep the pattern exactly the same. Since this chair was brand-new, I did not need to replace any of the stuffing or cushioning (Oh yeah!) This was BY FAR the cleanest chair I've ever taken apart!


Chair frame (arms and center support) separated
from chair center (seat/back).

Chair center (seat/back)
This part was pretty cool. If you're wondering how to tackle a recliner, the chair's seat, back, and reclining mechanisms can usually be detached and upholstered separately. For this chair, the seat, back and foot rest with the reclining mechanism came out as one unit. I didn't even have to detach the seat and seat back to do the re-upholstering. I did have to detach the foot rest, though. However, all of this made for a much easier reassembly. Be sure to save the screws & nuts for reassembly!


Recliner is starting to look more radiant, don't you think?! Finished chair center.

I got busy re-upholstering and forgot to take more pictures of the process...but here are some shots of the finished version. Put out the red carpet! 


Yes, this chair is a star in the making! Thank you G.E. for the opportunity to give your new recliner a make-over. Here is one more before and after for your viewing pleasure!


All for now...until next time!

Ciao,
-Jess


Tuesday, February 7, 2012

Loves Me Like A Rock-ing Chair

This is my absolute favorite project yet!! As you know, I love knowing a chair's history and seeing it get a second chance at life, instead of being tossed out to the curb.


I chose this post title 1. because I liked the way it sounded, and 2. because the story reminds me of Paul Simon's song "Loves Me Like A Rock". Above is a link to a youtube video for your listening pleasure.


This retro rocker originally belonged to my friend Brandi's great-grandmother. Brandi remembers her great-grandma rocking in this chair. She even found a picture.
Great-grandma, the original owner of this recliner.
My eyes spy cool drapes and awesome lamp shape! A mid century MUST! 

At some point in time, the retro rocker moved to Brooklyn with another family member. She knew she was a keeper and her family really wanted to recover her. Her family bought her a flowery dress, but never had time to finish the rest. After a few years of neglect, retro rocker was adopted by Brandi, a soon to be mama, to be used in her new baby boys nursery. I was assigned to bring Ms. Retro into the 21st century. And lucky for me, she was a willing participant!

Deconstruction of Ms. Retro was quite different than the my past chairs. Figuring out how to disassemble her parts was the most challenging part! Her back attaches with 2 levers (1 on each side).  You can find the release levers on her sides between her back and her frame (she came with instructions! See below).


These levers were really stuck in place, and needed
a good WD-40 treatment!!


Once I removed her back, I first prayed that I would be able to reattach it when I was done (it's hard to rock back and forth with out your back!) I was able to remove her coverings. I must say "coverings" in the plural form because there were 2 layers of fabric...orange + flowers= double staple/tack removal! : ) Here are some more before pictures before her makeover.


The moving mechanisms all needed a good cleaning and
treatment with WD-40 to reduce the squeakiness.

Original materials removed. A small bit of orange had to stay because
I was not able to remove the wooden arms...they are glued down tight with wood glue,
and I did not want to risk breaking them! 

Brandi chose to have Ms. Retro recovered in a durable cotton-duck fabric, in gray. 


Welting attached to the unmovable wood arms, covering the old orange remnants.

Suddenly Chic!!


                                                               Showing off them legs!

looks so funny as a base alone...reminds me of the Headless Horseman!


The back of her consisted of two attached cushions...this was also a first for me!...They turned out great!!

Attached cushions prior to stuffing.

Attached cushions stuffed with new foam core cushions
and Dacron wrapping.
Retro Rocker got all new digs: custom cut foam cushions for her seat and back, new Dacron wrapping all over, and a full covering of Force Field Fabric Protector (an invisible barrier to repel water, spills, and stains)...uber important while rocking around those kiddos!! 


Here's another look at her before and afters:


Before.


Thanks Brandi and family! I hope you enjoy rocking for years to come!!


Until next time,


Jess